For more on this article text or call Bob 214-636-7368 • visit www.CustomClassicCycles.com

Suggestions and opinions presented in "Tech Tips" are provided for the benefit of clubmembers and guests. If you're not completely comfortable with performing your own mechanicing please hire a
qualified shop or independent mechanic. Bob Cox and the NTNOA are not responsible for accidents, property damage, injury or fatalities resulting
from any information contained in "Tech Tips." • Unless otherwise stated, all graphics, photos, illustrations and copy in "Tech Tips" are the exclusive property of Bob Cox/Custom Classic Cycles • Copyright © 2015
from any information contained in "Tech Tips." • Unless otherwise stated, all graphics, photos, illustrations and copy in "Tech Tips" are the exclusive property of Bob Cox/Custom Classic Cycles • Copyright © 2015
Hardware store stainless steel bolts
transformed in 10 minutes in workshop This section of the NTNOA web site is where we'll share tips on bike repair, maintenance and improvement, plus good old and new "wrenching" techniques. Please send your tips, comments and suggestions to Bob Cox (Subject: "Tech Tips") at... bob@customclassiccycles.com |
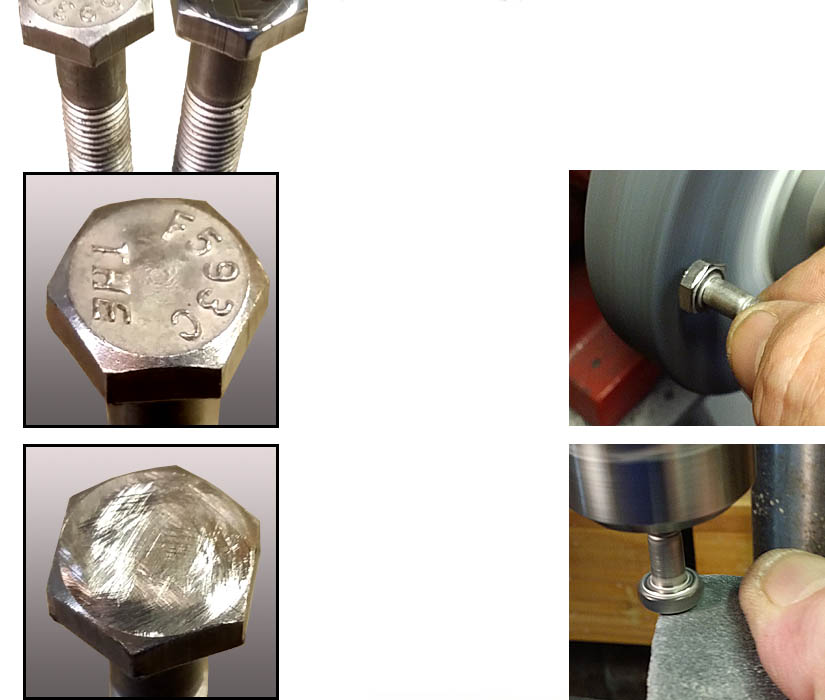
STEP 2 - Once your bolt head looks something like this one on the left, then you can chuck it up in your drill press. With the drill press on,
take a tightly folded square of 120 grit (thereabouts) emory and carefully hold it up against the head. I use two hands and arc the emory to focus most of the polishing on the center of the head. In the right
photo my other hand was holding the camera. When your finger feels heat, then move to a fresh spot on your emory. About 2 minutes is all it takes.
STEP 3 is to take the swirled lathe-turned looking head and either, a) emory it some more to get out any remaining scratches, or b) polish it to a brilliant
shine using stainless steel polishing mop and compound. Takes just a couple of minutes to get a nice shine, longer if you polish the flats. Optionally, you can go back on the drill press and with 220 grit or
finer give it a finished swirled pattern.
On the left is the before and after pix of an off-the-shelf Ace hardware stainless steel bolt that I've turned into a polished (or swirled) item using only your basic workshop tools - a drill press,
and a bench grinder with polishing mop on one end and medium-to-fine grinding stone on the other. If you're using stainless nyloc nuts then the coarse threaded bolts can be utilized at a considerable savings over
fine threads. Regardless they all have the same raised lettering and rough finish on the heads, and polish up beautifully.
STEP 1 - Using the flat side of your grinding wheel, carefully grind off the lettering while rotating the bolt in one or both directions so as not to grind a
sloped surface on the head. The goal is to remove all of the lettering and pitting without removing any more material than necessary. The bolt should get warm as you do this but not too hot to handle unless
you're being too aggressive. Light and easy works best and please no long sleeves, loose jewelry, gold chains (you know who you are), etc. Be safe. |
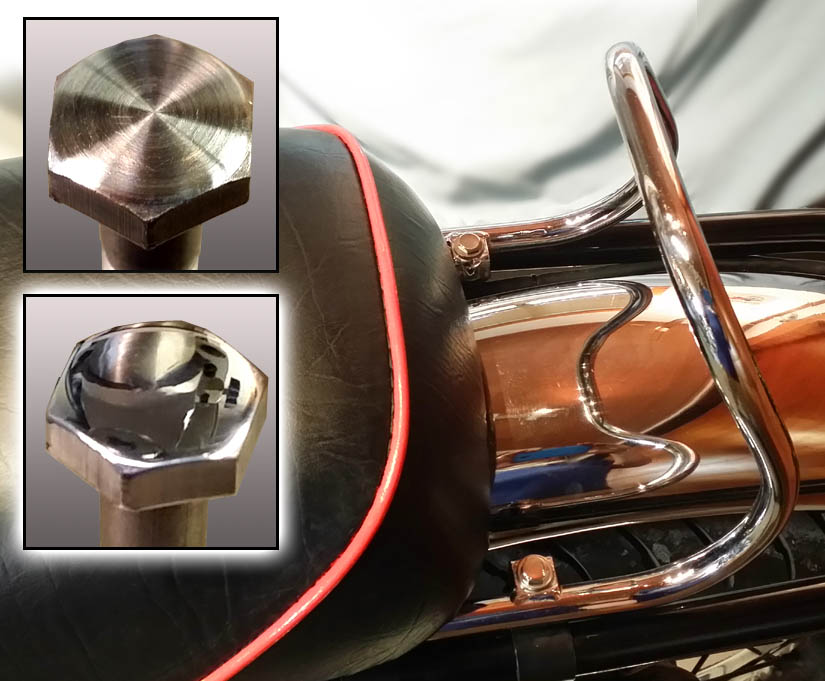
BELOW:: A prototype solo Commando seat, the grabrail bolts are now exposed so shiny is good. The solo seat shows off more of that stock stainless steel fender too. |